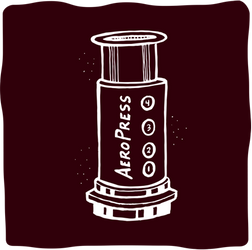

The AeroPress was invented by Alan Adler, the creator of the Aerobie frisbee, as a quick and simple way to brew coffee. Naturally, his 'fool-proof' coffee maker has since been taken by baristas around the world and turned into a complex art form, with recipes far more complex than what we'll start you with here. Whether you're looking for a quick and simple way to brew a beautiful morning cup at home or on-the-go, or planning on competing in next year's world championships, the AeroPress is for you.
-
What you need
-
Grinder
-
Hot water just off the boil (195-205F)
-
Timer
-
Stirrer

 Yeah, You're Fine
Set your water to boil and measure out the coffee you'll use. We recommend a slightly finer grind than you'd use in a drip machine, about as fine as table salt. Grind the coffee and take a moment to bask in the jealous glow of anyone around wishing they too were brewing an AeroPress coffee.

 Always Fresh
Place a fresh filter in the basket of the AeroPress and rinse it. This will both ensure a good seal when you affix the filter to the brew chamber, and also cleanse the filter of any paper taste. Go ahead and use some water to pre-heat your mug as well.

 Filter Side Down
While that's happening, screw the basket with filter onto the bottom of the brew chamber. Discard the water from your mug, and set the AeroPress on top of it, filter side down. This may sound obvious, but the 'inverted' method for making the AeroPress is a thing, so we figure we'll just be extra clear here. Ground coffee into the top of the brew basket, and we are good to go!

 Take The Plunge
Start your timer, and if you've got a scale, set the mug and AeroPress on it. If not we'll just wing it. Alan Adler will approve. 220g of water in, or fill to the handy-dandy number 4 on the AeroPress. For the AeroPress we do a slightly higher ratio of coffee to water than for other brew methods, in this case about 1:12. Give the coffee/water mixture ('slurry' if you want to be fancy) a good stir, and then insert the plunger into the top of the brew basket. A better seal will be created if you wet the plunger first. Done right, the coffee will defy gravity as the pressure seal holds it in the brew chamber.

 Undah Pressh-ah!
Depending on the strength of brew you'd like, let the coffee brew until the timer hits anywhere between 1:00 and 1:30. With one hand, hold the brew basket steady on top of the mug, and with the other hand press directly down on the plunger. You'll have to put a fair amount of pressure on the plunger, so be sure you're pushing straight down and the mug is stable. Keep pressing down until you hear a hissing sound. And that's the signal! Remove the AeroPress and prepare to enjoy the delicious coffee in your mug.

Dilution & Style Points
Aeropress coffee tends to be very concentrated. So dilute to your liking. When it comes to clean up, the AeroPress wins hands down for style points. Simply unscrew the basket, it should come away empty, and press on the plunger until the filter and coffee puck pop out. Quick rinse of the basket and plunger and voila! You're good to go. Happy trails!


