Be Your Own Brew Master


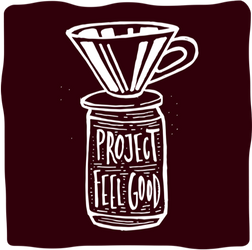
Three of the most common pour over methods are Chemex, V60, and Kalita. There are a few subtle differences we'll make mention of below, but for the most part you can approach each of these methods in the same way.
-
What you need
-
Chemex, Kalita, or V60 cone
-
Filters
-
Grinder
-
Scale
-
Gooseneck Kettle (recommended)
-
Hot water just off the boil (195-205F)
-
Timer
Let's get started

 Mind Your Grind
Set your water to boil and grind your coffee. There is a happy place in between the coarse grind size for a french press and the super fine grind for espresso, somewhere between fine and medium, that will be ideal for your pour over. If you're making a V60 or a Kalita, the grind setting for this will be on the finer side, roughly resembling sand. The Chemex on the other hand will use a slightly more open grind setting, akin to coarse sand.

 No Paper Trail
Each of these methods has a specifically designed filter. Place the appropriate filter in your brewing device as directed on the package. Use your pre-heated water to give the filter a good rinse, making sure to wet the entire surface. This will remove any lingering paper taste, will create a good seal between the filter and your device, and will warm your cup to boot. Discard water used for rinsing (this can be tricky with a Chemex, but not to fret; leave the filter in and carefully pour water through the spout).

 Make a Mound
Place your brewing device and mug onto your scale. Pour your ground coffee into the center of the filter, letting the coffee form a little mound. No need to level out or compress your coffee grounds - in fact, we prefer not to. Tare your scale and get ready to brew.

 A River Does Not Run Through It
At the beginning of the pour over, we want to saturate the grounds without actually running water through them. This is the trickiest part, but it's made easier with the use of a gooseneck kettle, which allows for more precise control of the flow rate of water. Start your timer and carefully pulse in 20-40g of water. Too heavy a pour and the water will just blitz through the grounds, effectively watering down your whole pour over. Ideally you will fully saturate the beans without letting any under-extracted water just run through.

 The Bloom
We're now going to let our coffee sit until the 30 second mark. In the industry, this phase is referred to as 'the bloom,' because with a fresh coffee you'll be able to see it off-gassing and forming bubbles on the surface. Better though to think of it as a 'pre-infusion.' The coffee is soaking in that first round of water, and in so doing will be primed for extraction when we begin our full pour.

 Pour Choices
Once we've hit that 30 second mark we can begin the pour. Our goal here is to create a steady pour, taking a full minute to pour 360g of water (a 1:15 coffee-to-water ratio). Begin in the center and work out in a spiral, being careful not to pour too close to the edge of the filter. With the Chemex and the V60, you'll want to keep as consistent a pour as possible. The Kalita on the other hand is designed to maintain a consistent flow rate, so we actually recommend pouring in pulses; 15 seconds on, 15 seconds off. This creates more agitation within the coffee grounds (since your pour can be twice as heavy) and thus a more even extraction.

 Trust in Your Gooseneck
A good rule of thumb for all of these methods is to fill the cone no more than three fourths of the way up with water. The reason being that at the end, when we stop pouring, all that coffee at the top is going to be left high and dry, before we're finished fully extracting. Thus the reason for the slow and steady pour (and why a gooseneck kettle will make your life easier, rather than simply making you look cooler).

 The Goldilocks Principle
Again, our goal, and a true test of your precision, will be to hit 360g of water at 1:30 on the timer. Hit the mark? Perfect! Let the remainder of water drip through for the next 45 seconds or so. If it's taking longer than that, your grind may have been too fine. Far less than that, your grind may have been too coarse. We're gonna assume though that you hit the Goldilocks window and that your extraction time was just right. Pull the cone at around 2:15-2:30 on the timer. And don't worry if there's still a little bit of water in there. Better to remove it now and avoid the potential for over-extraction notes to show up.

Worth the Wait
Now toss the filter and you are good to go! If you brewed straight into the mug you'll be drinking from, it's gonna be pretty warm. The last thing we'd want would be for you to burn your tongue and miss out on the beautiful complexity of flavors you created with your perfect pour over!